Tuesday, October 5, 2010

Brown Butter- Day 2 of Pumpkin Week

Have you heard of brown butter? It’s not a brand of butter or something you have to go to the specialty supermarket to find, but it will add warmth and depth to your baked goods unlike any other flavor.

The thought of allowing an ingredient to reach the burnt stage is unheard of the kitchen, but brown butter allows  you to break the rules. Brown butter is created by allowing butter to cook past the melting stage to reach a golden brown color and bring out a golden, nutty flavor that just so happens to pair perfectly with pumpkin.


This is the color you are looking to reach!
Any recipe that calls for melted butter can easily be replaced with brown butter. I will admit when I originally saw this recipe for brown butter pumpkin cupcakes in the Martha Stewart cupcake book the thought of getting butter so close to burnt intimidated me. However, if you’re afraid to try something new in the kitchen you’re never growing to improve. It turned out to be incredibly easy, but the difference it made in the recipe was incredible.


The kitchen is filled with so many everyday flavors filled with unlimited possibilities. Brown butter teaches us that even the most common ingredient can bring something new to the table.


My baking partner with a sweet tooth, was waiting for me to drop a piece!

Pumpkin Brown Butter Cupcakes
Adapted from the Martha Stewart Cupcake Book

Ingredients:
3/4 cup (1 ½ Sticks) Unsalted butter
2/3 cups all- purpose flour
2 tsp. baking powder
1 tsp. salt
1/2 tsp. ground cinnamon
1/4 tsp. freshly ground nutmeg
1/8 tsp. ground cloves
1 cup canned pumpkin puree
1 cup packed light- brown sugar
1/2 cup granulated sugar
2 large eggs


Directions:
1) Preheat oven to 325 degrees. Grease muffin tin or fill with baking cups.
2) In a saucepan, begin to melt the butter over medium- low heat. Continue to cook until butter begins to turn golden brown. Remove from heat and skim foam from the top.
3) Pour into a bowl, leaving any burnt sediments behind; set aside and let cool.
4) Whisk together flour, baking powder, salt and spices. In a separate bowl combine the pumpkin puree, brown sugar, granulated sugar, eggs and brown butter. Add the flour mixture and mix until combined. .
5) Divide batter into prepared baking cups, filling ¾ full.
6) Bake for 20 minutes, or until a toothpick comes out clean.


Frosting:
Note: I topped the cupcakes with a classic cream cheese frosting, but if you really want to enhance the brown butter flavor, you can try Brown- Butter Icing.


Brown – Butter Icing

Ingredients:
½ cup unsalted butter
2 cups confectioners’ sugar
2 tsp. vanilla
2 Tbsp. milk


Directions:

1) Follow instructions above for brown butter.
2) Add confectioners’ sugar, vanilla and milk, stirring until smooth. Once spreadable, use immediately.
3) Instead of spreading on the cupcakes, you will dip and swirl the cupcakes into the icing.

Monday, October 4, 2010

Day 1: PUMPKIN WEEK

With a slight delay I am happy to announce the start of pumpkin week on Beyond the Meal.
When most of us hear the word pumpkin, one of two images will usually come to mind. Either the perfectly orange, green stemmed pumpkins from the patch or the signature can bakers stock up on as fall weather hits. While nearly every recipe I have calls for opening up a can of pumpkin, one of my all- time favorite recipes relies on a different form of pumpkin.


Every fall I always head to Williams-Sonoma, a food lovers paradise, even if it's just to window shop. The store is always filled with so many cute knick knacks, spices and fall goodies that you feel happy just being in there. However, what I always hope for is the opportunity to try one of the treats they are sampling.

Five years ago I entered Williams-Sonoma looking for nothing special in particular. Then I noticed the sample for pumpkin dessert squares. After one small bite I was hooked and to this day I remember how much the flavor stood out to me. The pumpkin was not the dominating flavor, but the perfect sidekick to the crumble topping and buttery crust. It was so good I even stepped out of my usual window shopping mode and bought the pumpkin butter that was called for in the recipe, and I was so glad I  did.
I made it for Thanksgiving that year and it was a huge hit with the pumpkin lovers and non- pumpkin lovers in my family that I have continued to make it nearly every year. While there is always the desire to try something new, this recipe will never get old in my book and I plan to make it for many more Thanksgivings to come.

Note: Any pumpkin butter will work for this recipe, if Williams-Sonoma’s is over your price range. I have used a variety of pumpkin butters over the years and the recipe always turns out great. Just make sure the amount is equivalent to the Williams-Sonoma variety.


Pumpkin Dessert Squares

Recipe source: Williams- Sonoma
1 Box of Cake Mix, divided
½ cup butter, melted
1 13 oz jar of pumpkin butter or William Sonoma Muirhead Pumpkin Pecan Butter
3 eggs, divided
2 Tbsp. milk
1 Tbsp. all- purpose flour
¼ cup sugar
¼ cup butter, softened
1 tsp. cinnamon

Directions:

Preheat the oven to 350 degrees
Crust:
Set aside 1 cup of cake mix and combine the rest with melted butter and 1 egg.
Evenly spread into the bottom of a sprayed 9 X 13 pan.
Filling:
Combine the pumpkin butter, 2 eggs and milk. Pour over the crust and spread evenly.
Topping:
Mix together 1 cup cake mix, flour, sugar, butter, and cinnamon. Mix until crumbly and spread over pumpkin filling.
Bake for 35- 40 minutes.

Thursday, September 16, 2010

More than a recipe

Once upon a time the only source for recipes was mothers, friends and a few legendary cookbooks. In today’s world if you need a recipe for classic spaghetti sauce you don’t need a secret family recipe because millions of food bloggers are sharing their own. Even with all of these sources, it’s funny to think we cook less today than we did in the past. We all face the problem of recipe overload and I recently began to wonder if it’s an inevitable result of the times.


I tear out, bookmark and copy recipes just about every day. I know if I don’t make the recipe within a week it’s going to get stashed away and replaced by a new recipe that catches my eye. When it comes down to it, I will always have more recipes than I can handle.

In its basic form a recipe is a formula of measurements, directions and ingredients. What sets it apart from any other formula is the passion, history and joy a recipe brings to life. When we find a new recipe, it’s more than just a meal. It can represent a child’s first birthday, a memorable first date or just the perfect combination of flavors. This is the true joy that comes from finding recipes on food blogs, magazines and old family recipes. They bring us into the kitchen of cooks all over the country. While it may be overwhelming at times, I believe the recipes you are meant to cook will always find a way to your kitchen. I know this because of a simple recipe for yellow cake that found its way to me several years ago.

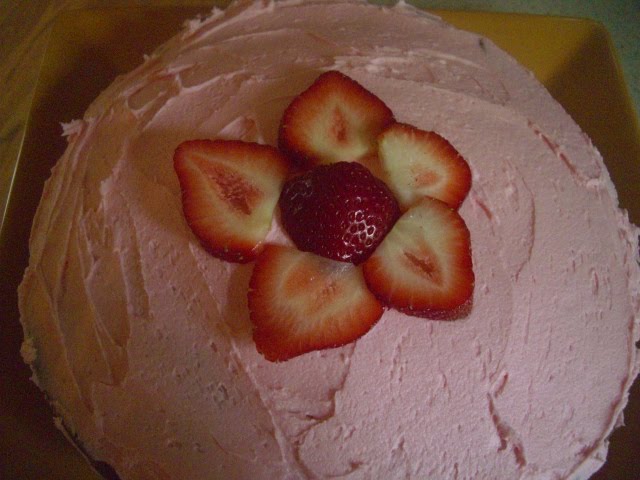
I don’t recall the exact details of how I found Ina Garten’s recipe for Birthday Cake with Hot Pink Icing, but let’s face it anything with hot pink is going to catch a girl’s eye. However, I do recall I was making it for my mom’s birthday and I knew the slight addition of lemon in the recipe would be perfect. It was one of those moments when you don’t feel the need to keep searching, or second- guess, you just go with it. I may have picked a different color for the icing (sorry hot pink), but my mom loved the cake more than any cake I could have found at a bakery. To this date I have cherished this recipe and while I may try new yellow cake recipes here and there, this recipe is what I always return to.


There may not be a solution to recipe overload and I am fine with that. I know in the end the search is just part of the process to find the best.


Yellow Cake
Source: Adapted from Ina Garten

Ingredients:
18 Tbsp. unsalted butter, at room temperature
3 cups sugar
6 eggs, at room temperature
1 cup sour cream
1 ½ tsp. vanilla
1 lemon, zested
3 cups all-purpose flour
1/3 cup corn starch
1 tsp. kosher salt
1 tsp. baking soda
1 ½ cups fresh strawberries, diced ( optional, if in season)

Frosting:
3 sticks unsalted butter
3 lbs. powdered sugar
9 Tbsp. milk
3 tsp. vanilla

Directions:
Preheat oven to 350 degrees F.

Butter and flour two 9 inch cake pans. Set aside. Cream the butter and sugar, until fluffy.

Add eggs, 2 at a time, then add the sour cream, vanilla and lemon zest. Mix well.
Combine the flour, cornstarch, salt and baking soda. Slowly add to the batter.

If you are adding fresh strawberries, fold them into the batter at this point.

Pour into prepared cake pans.

Bake for 30 -40 minutes or until a toothpick comes out clean.

Cool the cakes and frost.

For frosting:
Cream butter on high speed. Gradually add in powdered sugar, milk, vanilla and food coloring if you wish. Mix until creamy and light.

Note:
This recipe works great for cupcakes or 1 layer cakes. Just cut the recipe in half and the frosting in half. Cupcakes will bake quicker so check the oven at 25 minutes.


Friday, September 10, 2010

Fall Comfort

As fun and relaxing as summer is, nothing can hold back my excitement for fall. Cozy sweaters and a chill to the air fills me with a sense of comfort that no other season can compete with. However, fall does not truly start- at least in my world- until that first taste of the best fall flavors. Cinnamon, butternut squash, honey crisp apples and sweet potatoes all top my list, but nothing ever reaches the place pumpkin has in my heart. For awhile I thought I was alone in my excessive love for pumpkin at the start of fall, whether it was a cookie, bread, cake or entrée. Yet , this season when I saw how much excitement was being built for the Pumpkin Spice Latte at Starbucks and the joy of other food bloggers to start baking with pumpkin, I knew I was not alone. Pumpkin is a universal favorite and while it used to be synonymous with Thanksgiving pie, today the possibilities for pumpkin are truly endless.

I know this build- up may have you thinking a pumpkin recipe is about to follow, but you’re going to have wait a little longer. However, you can check out my pumpkin cookie recipe from last season. I can’t wait to experiment with all new pumpkin recipes, and share my classic favorites with you. I am already starting to plan for this, and can’t wait for my favorite part of trying all the recipes.

Last year the food blogger Streaming Gourmet did a cool idea called “31 Days of Pumpkin” where she posted a different pumpkin recipe every day during the month of October. Some may love 31 days of chocolate, but for me a month of pumpkin recipes is music to my ears. I bookmarked a few of her ideas and plan to go back to them in my experimentation process.

I would love to do my own 31 days of pumpkin, but I want to start with a goal I know I can accomplish. So I am going to keep it simple, and am very happy to announce October 1- 7 as Pumpkin Week here on Beyond the Meal, 7 days and 7 different recipes.

I take pumpkin very seriously, so you can be sure I will be only post recipes that have been tried, loved and enjoyed. However, I have never been one to have the patience to wait, so you can expect a few sneak peek pumpkin recipes as Pumpkin Week approaches.

Since pumpkin is getting a whole week, it’s only fair to give other fall flavors time in the spotlight.

First up is a spin on the traditional snickerdoodle cookie, with Snickerdoodle Blondies from Recipe Girl. The warm cozy flavors of cinnamon and nutmeg run through every bite making it the perfect treat to pair with an afternoon coffee on a chilly fall day. You would also make a lot of fans, if you brought this with to a tailgate, but that's just a suggestion.


When you need a side dish who doesn’t turn to the sweet potato during the fall months. There are plenty of recipes out there, from mashed, sautéed and fried. However, one of my favorite versions is sweet and simple and only requires three extra ingredients that you always have on hand. Are you intrigued? You will be after one bite.


Get cozy because it’s going to be a comforting fall here at Beyond the Meal.


Snickerdoodle Blondies
From: Recipe Girl

Ingredients:

2 2/3 cup all- purpose flour
2 tsp. baking powder
1 tsp. ground cinnamon
¼ tsp. ground nutmeg
½ tsp. cream of tartar
1 tsp. salt
2 cups brown sugar, packed
1 cup butter, room temperature
2 large eggs, room temperature
1 Tbsp. vanilla extract
1 cup cinnamon chips (optional)

Topping:

2 Tbsp. granulated sugar
¼ tsp. ground nutmeg
1 tsp. ground cinnamon

Glaze:

1 cup powdered sugar
1 tsp. ground cinnamon
¼ cup heavy whipping cream
1 tsp. vanilla extract

Directions:

Preheat oven to 350 degrees. Spray a 9X 13 pan with cooking spray.

Combine flour, baking powder, cinnamon, nutmeg, cream of tartar and salt; set aside.
In a stand mixer or with a hand mixer, beat brown sugar and butter together until smooth. Add eggs one at a time, add vanilla. Beat mixture until smooth. The batter will be thick. Mix in cinnamon chips, if you desire.
Pour into prepared pan. Spray cooking spray onto hands and press down until batter is even. Sprinkle with topping.

Bake for 25- 30 minutes, or until a toothpick comes out clean. Meanwhile, prepare the glaze by whisking together heavy cream, powdered sugar, vanilla and cinnamon.

After bars are cooled drizzle on the glaze in any decorative deign you please. Let set for five minutes.

Slice into bars and serve.


Baked Sweet Potato Fries

Ingredients:

1 lb. sweet potatoes
Olive oil
Salt and Pepper

Directions:

Preheat oven to 400 degrees.

Slice sweet potatoes lengthwise into ½ in strips. Place on a cookie sheet covered in tin foil. Drizzle with olive oil, salt and pepper. Using your hands spread the olive oil, salt and pepper onto all of the sweet potatoes. Make sure they are evenly coated. Bake for 30- 35 minutes.

Thursday, August 19, 2010

l’ arte d’ arrangiarsi – The art of making something out of nothing


This past weekend I saw the movie Eat, Pray, Love. I read the book and loved it, and I was happy to see the movie was an accurate representation. The trip I couldn’t wait to see brought to life was her portion of time in Italy.

I have never been to Italy, but there is no doubt in my mind I will make it there one day. They have a passion for life; that I want to experience and live. Until the opportunity comes I am going to take a lesson from them and begin making art out of nothing.

In Italy food is not attached to thoughts of low-fat or low- carb and whether it’s frozen or fresh, so why do I? Why can’t I simply enjoy food for what it is? I  know the feeling of allowing myself to enjoy a piece of cake, or freeing myself from worrying about what diet I will be on next. It is a feeling of happiness, but I only let it last for so long before guilt replaces it. An Italian would never feel guilty for taking second helpings, and why should they?

I already allow myself to feel guilty for so much. Like most of us do I turn to food to ease my feelings of guilt and as a result only feel more guilt. It’s a terrible cycle and I don’t have to do this.

I don’t have to over eat or put on twenty pounds to lose this guilt, I simply have to focus on food as an opportunity to nourish my mind, body and spirit. If I allow myself to enjoy a meal without feeling awful a minute later, I won’t feel the same cravings to do it every day.

So what does making art out of nothing mean to me? It means looking at every meal as more than something to eat, but as an opportunity to try new flavors, create memories and connect with the cultures and people that surround us.

One of my favorite Italian dishes is gnocchi. It is a perfect example of making art out of nothing. Topped off with a pour of olive oil, lemon, garlic, a few veggies, it's comfort on a plate. It’s the kind of meal you can’t help but pair with a crusty piece of bread and a tall glass of wine. Now that’s a reason to celebrate.


For dessert my art comes from experimentation. Adding a bit of extract to a frosting can make a world of difference. Even turning a frosting pink rather than leaving it white can cheer up a cookie or cupcake. My belief is that when it comes to baking or cooking it’s not about who can make the best rosette out of frosting, but who can bring the most passion to a dish. Even if it’s just the addition of one ingredient, that is where true art lies for me.


Gnocchi with spinach and lemon
1 pkg. of store bought gnocchi ( or homemade would be even better)
1/4 cup olive oil
2 garlic cloves, minced
1/4 cup onion, chopped
3 cups of spinach
Juice of 1/2 lemon
1 Tbsp. lemon zest
1 cup of shredded parmesan cheese

Bring water to a boil and cook gnocchi according to package directions. It will cook very quickly. They are done when they begin to float to the top.  Drain and set aside.

In a large skillet heat the olive oil and garlic over medium-low heat. Add the onion and saute for 1 minute.  Add the spinach (it will cook down), lemon juice and zest. Cook until spinach is just wilted.

Toss with the gnocchi and add salt, pepper and parmesan cheese.

Serve and enjoy with crusty bread or a side salad.

Note: The picture above has chicken that I included from dinner the night before. The addition of chicken or shrimp would be delicous in this recipe.


Raspberry  Frosting
(Pictured on cookie above)
Recipe adapted from A Homemade Life by Molly Wizenberg

8 ounces cream cheese, at room temperature
6 Tbsp. butter, at room temperature
3 cups powdered sugar, sifted
1 1/2 tsp. Raspberry extract
Red Food Coloring

Directions:

Combine the cream cheese and butter in the bowl of a stand mixer with the paddle attachment and beat on medium speed until smooth.

Add the powdered sugar gradually, scraping down the sides as needed.

Add the raspberry extract and a few drops of food coloring. Beat until smooth.

Use on your favorite sugar cookie or for cupcakes.

Tuesday, August 17, 2010

Healthy Ice Cream: Yes, you read that correctly

I can rarely end a night without a little something sweet. One of my absolute favorite sweet treats is ice cream. One of the main reasons I love it is for the creamy, smooth texture. However, I don’t love the high amount of calories and fat that comes along for the ride. My search was on for a healthy ice cream, but it sounds impossible right? Let’s just say nothing is impossible and if you enjoy the flavor of bananas- YOU MUST KEEP READING.

In the June issue of Cooking Light, they did a small feature on different ways to make treats with a banana. They all sounded pretty good, but the one that immediately caught my attention was for quick and easy banana ice cream. It didn’t call for an ice cream machine, just a plan banana, a blender or food processor and any additional flavors of you’re choosing. It seemed too good to be true and I had to find out for myself.

I had my doubts that this would taste anything like the texture of ice cream, but I was willing to go along with it. All you had to do was place peeled ripe bananas in the freezer. Once they are frozen you simply add them to your blender or food processor. It’s really that simple.

This is where the fun begins; you can add any additional flavors you like. I chose to add some peanut butter and a tiny amount of agave. I added the peanut butter once the bananas began to get creamy, but were not completely unfrozen.

After extra flavors are added, you continue to pulse until the bananas are completely smooth and creamy. What results is the texture of soft- serve ice cream. At this point you are probably saying how come I did not know about this creation sooner, because that was my exact thought after the first bite.

I am sooooooo anxious to try this with Nutella, because I can only imagine how heavenly that will be. You could also include it in an ice cream sundae with toppings (caramel would be delicious) and whipped cream. I know that takes away from the health benefits, but at least the ice cream is nutritious.

Enjoy and please share your own creations with me if you make this delicious treat.

Thursday, August 12, 2010

Summer is not over yet....


Back to school supplies have hit the stores and fall fashions are in the windows. As August quickly flies by I can’t help but wonder where the summer went. It feels like just yesterday I was grilling out for Memorial Day and now Labor Day is just around the corner. While retailers may be trying to get my mind on fall, I am still focused on the fresh food of summer.


A few weeks back I went to a local farmers market in my neighborhood. I hope to be organized enough one day to buy a bulk of that fresh food at once; however I have learned I would rather buy small amounts than see it go bad in my fridge (a terrible feeling for any foodie).

When I went to the farmers market I didn’t know exactly what I wanted to make, so I allowed the market itself to provide my inspiration. I was sold upon seeing the heirloom tomatoes and included a cute baby eggplant to go with it. What I would make with that I didn’t know at the time, but the one thing I knew was that I wanted to keep the flavors simple.

This summer more than usual, I have been obsessed with making toasted open face sandwiches. They are extremely simple to make and can be done with just about any ingredients on hand. What I love about this dish is that I find it to be in between making a pizza and a sandwich. The bread resembles a crust ready to be filled with toppings, but at the same time the perfect individual portions brings a level of joy that only a sandwich can deliver. It’s truly the best of both worlds. When I came home with the eggplant and tomatoes, it didn’t take long for me to figure out what to make.

A tomato, mozzarella and basil sandwich is a classic summer dish, but I decided to put a new spin on it with the addition of the eggplant. What resulted was a fresh balance of flavors that truly tasted like summer on a plate. The eggplant provided a thicker and heartier texture to the dish, without taking away from the sweetness of the tomato. I had no idea such a simple addition would add so much, but isn’t that what experimenting in the kitchen is all about?


It would be a lie if I said I wasn’t excited for the flavors of fall to come into season. It’s truly one of my favorite times of year as pumpkin, cinnamon and apples fill the air. Yet, during the 90 degree days of August my mind will still be on that tomato, basil, mozzarella and eggplant.

Open- Faced Mozzarella, Eggplant and Tomato Sandwiches
(Note: I tend to free hand the ratio of olive oil and balsamic vinegar, below is an estimate you may do it to your own taste)

Ingredients:
1 loaf of your favorite crusty bread (Ciabatta, Italian, French baguette), cuti into 6 slices
1 small eggplant, cut into 1/2 inch slices
3 Heirloom tomatoes ( or any tomatoes you have on hand), sliced thin
2 cloves garlic, minced
1/2 cup olive oil
1/4 cup balsamic vinegar
Salt and pepper to taste
6 slices of fresh mozzarella
Fresh basil leaves

Directions:
Preheat oven to 350 degrees.
Slice bread into 6 slices and place on cookie sheet.
Combine the sliced eggplant, tomatoes, garlic, olive oil and balsamic vinegar. Allow to sit for 5- 10 minutes. Add salt and pepper.
Place an equal amount of tomatoes and eggplant on the sliced bread. Top with fresh mozzarella.  Place in oven and bake 10- 15 minutes, or until cheese is melted.  Top with basil and serve.